Una vez que haya ordenado su servidor, el sistema le enviará un correo electrónico con la siguiente información:
Dirección web del panel de control de la plataforma
Nombre de usuario y contraseña para acceder al panel.
contraseña para transmisión en vivo.
PASO 1 - Preparación del servidor
Conéctese a su panel de control y haga clic en el menú para "Configurationes".En el Título de la señal, escriba el nombre de su radio, en la URL del sitio web ponga la dirección de su sitio web.
En la sección Puntos de montaje, encontrará el primer y principal servidor del servidor de forma predeterminada: "/ stream". Es posible comprar puntos de montaje adicionales por separado y crearlos en esta sección. Puede usar el mismo servidor para diferentes tasas de bits de transmisión. El número total de ranuras sigue siendo el mismo independientemente del número de puntos de montaje.
Si usa un reproductor Html5 o Flash, no recomendamos insertar un archivo de introducción o alternativo. Podrían bloquear a los jugadores.
Todas las otras configuraciones, si no son muy prácticas en Shoutcast, le aconsejamos que no las toque.
Haga clic en ACTUALIZAR. Tu servidor está listo para ser programado.
IMPORTANTE: Cada vez que realice cambios en la configuración (configuraciones) del servidor, aún deberá reiniciar el servidor para que los cambios surtan efecto. Guardar las configuraciones no es suficiente.
PASO 2 - EN TRANSMISIÓN
En este punto, después de configurar el servidor, vaya a la página principal de su panel haciendo clic en "Resumen".En el menú, haga clic en "Servidor / Iniciar".
En el programa de codificación que está utilizando (por ejemplo, MBStudio, MBRecaster, Winamp, etc.) ingrese los siguientes datos:
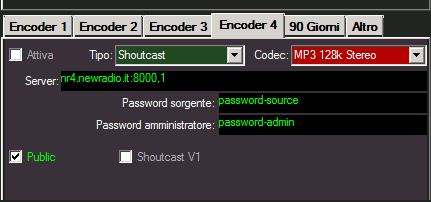
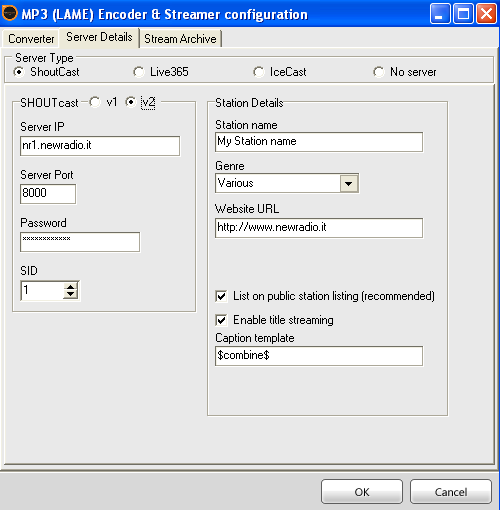
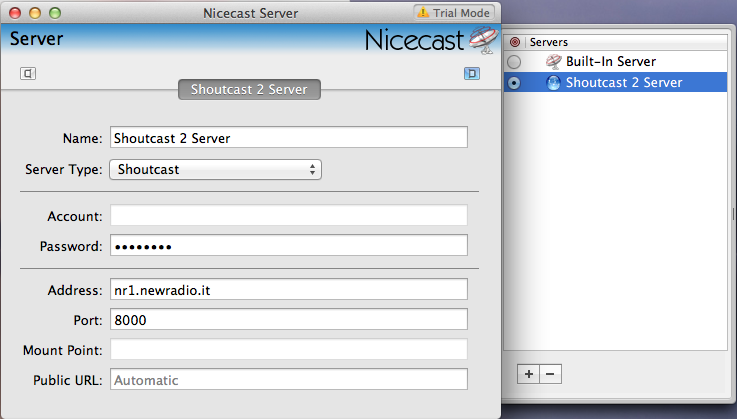
Tipo de servidor: Shoutcast
Formato de audio: Mp3 o aac +
Velocidad de bits hasta 192k (recomendamos max 128k). La suma de los puntos de montaje no debe exceder el límite del servidor.
HostName: port / stream (dirección del servidor incluida en el correo electrónico enviado al momento de la activación del servicio: puerto / nombre del servidor del punto de montaje en el que desea transmitir)
En algunos programas, como MBStudio y MBRecaster, ingrese el campo del servidor: HostName: puerto, 1 (el número después de la coma corresponde al número del punto de montaje en el que desea transmitir)
En otros debe especificar la cantidad de SID. El pid corresponde al punto de montaje que desea usar. Normalmente se debe establecer en 1.
Contraseña: la contraseña de transmisión enviada por correo electrónico durante la activación (que no debe confundirse con la contraseña de administración).
Estadísticas de contraseña: la contraseña de administrador de su servidor que coincide con la del panel de Cast de Centova. (Solo en MBStudio y MBREcaster)
Presione el botón de conexión
Aquí hay algunos ejemplos de configuración en algunos programas:
 |
 |
 |
 |
| MBStudio / MBRecaster | SAM Broadcaster | Winamp | Nicecast (Mac) |
Notas para MBStudio / MBRecaster:
Si usa uno de estos programas, desde la versión 8.55.8 debe ingresar, además de la contraseña de transmisión, la contraseña de administración del servidor en el campo 'Estadísticas'. Normalmente es lo mismo que la contraseña del panel CentovaCast.
Si este campo se deja en blanco, las estadísticas en MBStudio / MBRecaster no se mostrarán.
Su radio está en el aire y puede ver el historial de las pistas en la parte central del panel.
IMPORTANTE: Hasta una nueva actualización, cada vez que se inicia desde un comando de inicio / detención / reinicio del servidor, incluso si la respuesta del comando es positiva, el menú de la izquierda no se actualiza automáticamente. Antes de continuar, le recomendamos que actualice la página haciendo clic en "vista general".
Para escuchar su canal, puede hacer clic en uno de los enlaces en la parte superior derecha del panel.
En la sección "Enlaces rápidos" del menú, encontrará el primer encabezado en la parte superior del enlace a su página personalizada "Su página de prueba para la transmisión" que puede dar a las personas interesadas para escuchar su radio, mostrar los títulos y las estadísticas Si en cambio tiene su propio sitio web, dele a su webmaster los enlaces que siempre encontrará en los enlaces rápidos en la sección "Escuchando para escuchar". Usando el servidor en aac +, la mejor forma de explotar su potencial en su sitio es ordenar nuestro reproductor Html5.
En la sección "Configuración / Widgets" del menú puede configurar y generar muchos códigos Html / javascript que su webmaster puede usar para las páginas del sitio de radio.
PASO 3: CREAR UN AUTHHASH (hacer la transmisión pública en Shoutcast.com)
A diferencia de Shoutcast 1, en la versión 2 de shoutcast, la publicación en el directorio público de shoutcast.com no es automática. Necesitamos crear una cuenta de autorización llamada "Authhash".Por defecto, el servidor se entrega en modo privado. Primero debe ingresar a la configuración del servidor (configuración / configuración) y en la sección "reemplazos del servidor" seleccionar "servidor público" a "automático" o "siempre". Al final guardar y reiniciar.
En el menú, haga clic en "servidor / administrador". Estará en la página de administración de su servidor Shoutcast2. En la parte superior derecha, haz clic en "Inicio de sesión de administrador" e ingresa "admin" como nombre de usuario y contraseña del panel de control. Se le presentará una lista de puntos de montaje activos en su servidor. Haga clic en "Crear Authhash" y luego siga las instrucciones descritas. En la práctica, deberá conectarse a https://rmo.shoutcast.com/ y crear su cuenta shoutcast.com completando todos los datos requeridos. Una vez que se haya creado la cuenta, haga clic en el elemento "agregar estación" en el menú de usuario en la parte superior derecha. Se recomienda suscribir el plan en VERDE y no el que está en AZUL. Al final se le emitirá un código 'Authash' que deberá ingresar en el campo en el servidor. Después de guardar su radio, estará visible en el directorio dentro de unos minutos.
También le recordamos que una vez que se haya cambiado la configuración "pública" del servidor, no será posible escuchar el sonido hasta que se cree el Authhash correspondiente.
